
As we come to being only a few months away from the convention season, I have finally finished my Catwoman cosplay. As a few of you may know, this isn’t the first time I have made this costume, although I did certainly go about doing more things differently since I wanted to try and make a more accurate version opposed to my last effort.
NOTE: Since my previous attempt, I received a lot of interest from people wondering how I went about making and revising some of the pieces on my costume. I won’t claim that my methods were perfect. This tutorial only reflects how I went about the process, but you may choose to take an entirely different route.
I apologize if I’m missing some pictures in advance. I unfortunately had to rush to get the catsuit finished and was not able to take pictures of every single piece of the process I went through.
So, let’s begin!
What You Will Need:
- Catsuit for the base
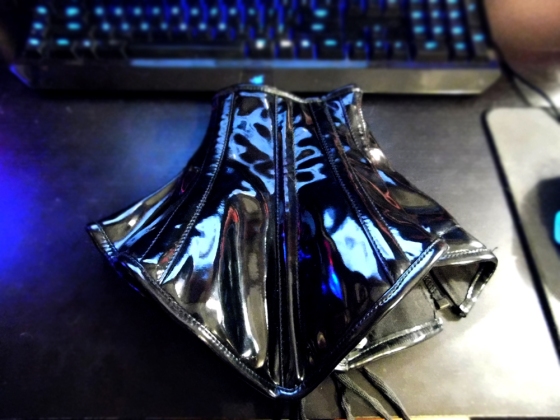
- Black PVC lace-up neck corset
- Corset
- About 30 yards of 1/8 inch white ribbon (I bought 5 spools at 10 yrds a piece to be safe)
- Black thread
- Needle
- Pliers
- Scissors
- Seam Ripper
- Pen
The Neck
Your first step in creating your Batman Begins Catwoman cosplay is retrieving your Catwoman cosplay suit. Out of all the reasons that I chose to buy from Charades again, the main reason I am going with this particular catsuit is because the zipper is on the back like the movie’s version and (having worked with this same costume before), I also found that it accepts thread and ribbon well.
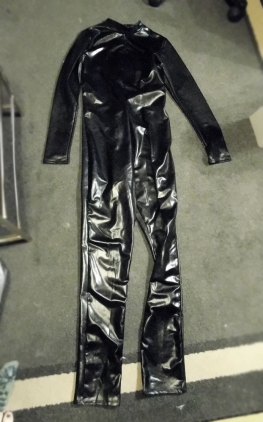
My first, and biggest task that I decided to tackle was the neckline. Most catsuits you purchase you will find won’t have a high neckline like it should in Tim Burton’s design. So instead of attaching PVC to the cowl like I did in a previous attempt, I aimed this time to make a “turtleneck” that I knew would stay up and look great while still being attached to the catsuit itself.
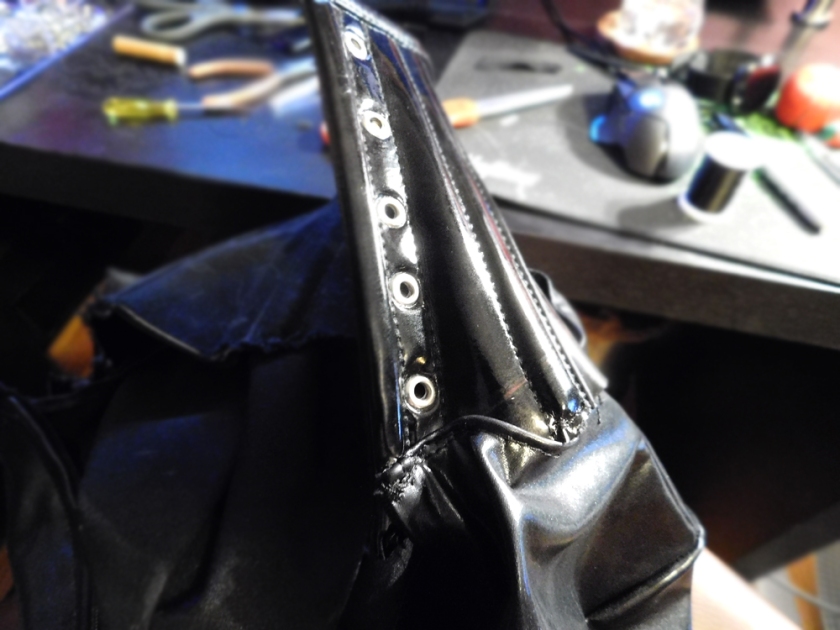
The first step to doing this of course, is to eliminate the already existent collar on the catsuit. To do this, take a seam-ripper and very carefully remove the seams to detach the collar piece. You don’t wait to ruin this piece if you can because it will be used later to hide the busk on the corset.
Hem the neckline on the catsuit once you are finished removing the collar. This will help to blend the neck corset and the suit together. Using your pliers will help to pull the needle through better!


Now your next step will be to attach the neck corset to the suit. I won’t claim that the results of using a neck corset are comfortable. I personally found that using a neck corset as my neck-piece means that my head is constantly being “held up” by stiff material. There were a few things I was able to do though to make wearing it for a duration bearable, and I found I still loved the results!
Your first task for this item will be the put on the neck-corset, and then put your catsuit on after. Make sure to stand as you do this process. Use a mirror or have a friend help you mark with a pen where the neckline ends on the neck-corset (I used a simple black pen for this task). This will give you a good idea of where the two pieces of the costume are going to meet.
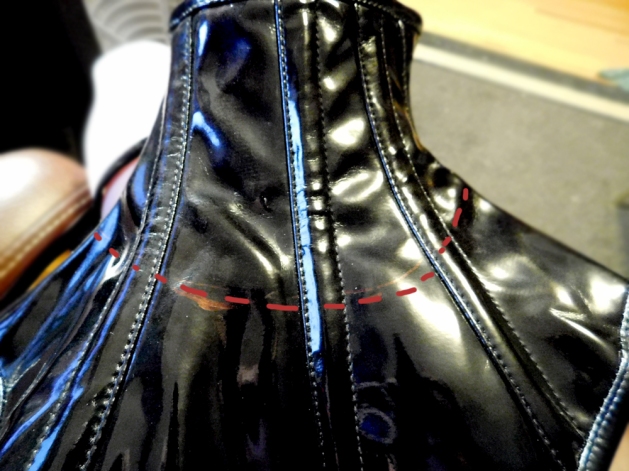
Once you have established your lines, you are then ready to cut. Cut about an inch to an inch and a half below the line that you drew! You want to give yourself plenty of room to sew on when you start sewing these two pieces together!
NOTE: When you are finished, you may want to test out to see how the neck-corset sits on you. As someone who has a weak gag reflex, I found the four pieces of boning in the front to press against my throat too much which in turn gave me the tendency to dry-heave. I removed those pieces but kept the boning in the back so I can more easily move my head. To do this, now that the item is cut, you should be able to pull out the boning with your pliers. Sew the remaining bottoms of the boning closed, or cut out a piece of the scrap material you just cut off to close up the bottom part.
When you are ready, you can move on to sewing your neck-corset to the catsuit by using your black thread and following the line that you drew on previously. Remember to use your pliers again!
Once you have finished, your results will look a little something like mine!
One of the most noticeable differences between the catsuit and the neck-corset will be that one is slightly more glossy than the other. However, our next step will detract from this problem.
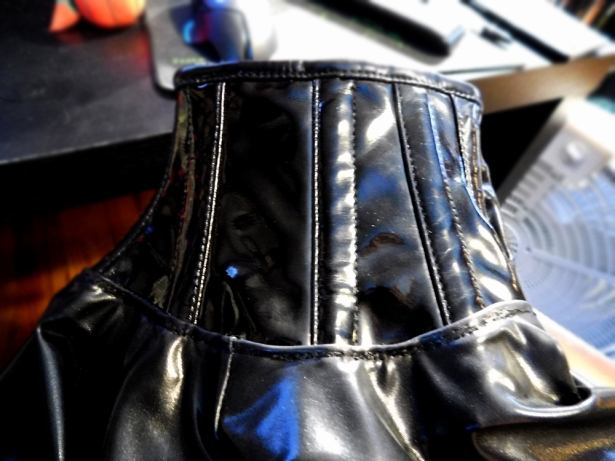
Now that your neck-corset is fastened to the catsuit, you can now begin sewing the ribbon on. You will again need the pliers for this step. Sew above and below the stitches to blend the stitching you did at the neckline of the costume.


The Corset
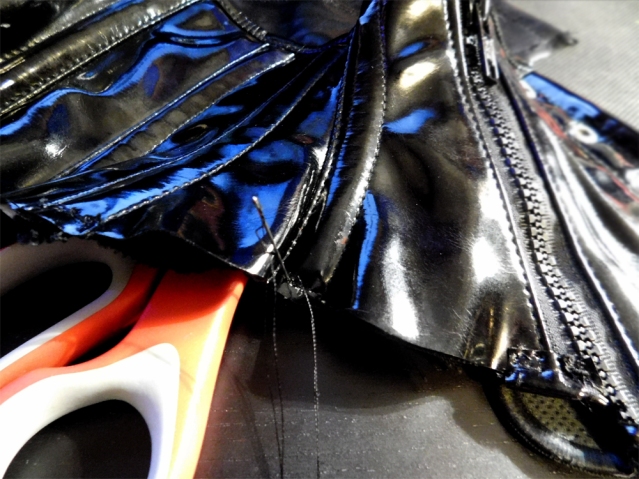
Now that you have replaced the collar on your catsuit, it is now time to start working on the corset. Take the scrap material that was taken apart by the seam ripper in the first step and re-hem it. With the scrap collar re-hemmed, you can now sew it onto one side of the busk. To end the top and bottom cleanly, fold the ends of the re-hemmed material over the top and bottom of the corset and stitch those pieces as well so that the old scrap collar will now act as a “hidden fold” for the busk.
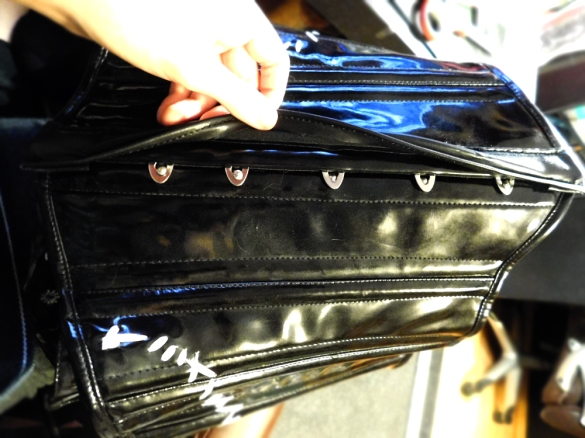
As you can see, re-purposing the collar to make a hidden busk does a decent job. My work wasn’t perfect, but for many distanced shots, you cannot tell that there are any exposed metal bits.
Make sure to also add white ribbon to your hidden busk!


Let’s Detail!
By far the easiest and most tedious thing you’re going to run into with this costume is doing the string detailing for this outfit.
By this point you should be finished with the neck of the catsuit and your corset, which means that you can start with sewing the white ribbon on the rest of the catsuit. Put on your catsuit and your corset and start marking with the pen where the lines stop and end on the suit. Again, having a friend or family member help is useful.
I used several references to get as accurate to the suits’ design as possible, but one of my main resources I found to be the most helpful was from an artist named TrevorGrove on DeviantArt. He offers a great 360 shot of his very accurate Catwoman sculpture.
Use the pen marks as guidelines as you go. Make sure you are wearing your corset so you know where your starting and ending marks will be at your bust and legs.


Once you done with the ribbon, you are finished!!! The ribbon looks great and adds some amazing texture to the costume! The ribbon also helps to blend matte and gloss textures on the suit!
I hope that this tutorial has proved useful for those that are looking to undertake a Catwoman cosplay in the future.
If anyone has questions, feel free to leave a comment. I’d love to help!
Also, be sure to follow our progress on Facebook at:https://www.facebook.com/CirceSistersCosplay
Come visit our Youtube channel to view our reviews, events, and tutorials!
https://www.youtube.com/channel/UCVk4ccmU8YvKxHBgJ9EXtYQ/videos
“I am Catwoman, hear me roar!”
